Tuesday, January 18, 2011

new duvet: i'm pressed!


For a while, I had my eye on this duvet cover from West Elm.  Then, soon after Xmas, a friend pointed out that it was on SUPER sale, WITH a 20% off code!  This meant that I was able to get the duvet cover and two shams for less than $60- cant go wrong with that!  Add in a down-alternative duvet insert/comforter from HomeGoods, and new bedding complete!


A few days after buying the duvet, and while (impatiently) waiting for it to arrive, I see YoungHouseLove got the same one!  So, now I look like a copy-cat.... not true!  But doesn't matter, cuz LOOK HOW AWESOME!!


I previously had a reddish-orange quilt in the room, and a lot of red-hued furniture.  This was great, and very lux, but I was tired of it and felt it was too much red & gold and not enough contrast.  Then, when the beau moved in, the mix-match furniture added to the many red-orange-gold tones in the room!  The teal-green duvet presents the perfect amount of contrast and color to the room.  I also love the amount of white in the design, as it keeps the room bright and lighter... and allows me to work in that ceramic rhino (from ZGallerie- I have a weird love of rhinos.)


I also really dig how the golden-brown in the duvet design really ties in perfectly with the gold on the walls, curtains, and previously-purchased decorative pillows. 

We also opened up the room by re-organizing our clothes and closets, which allowed us to take out the tall dresser, (seen here.)  I want to confess that re-organizing and re-arranging furniture makes me giddy-happy... and moving this dresser opened up so much space!  Visually, when you walk in the door, you now have an unobstructed path straight into the room and there is a wider walkway on the other side of the bed.  It also makes the back closet easy to access, and therefor use.  And finally, removing the tall dresser from my bed set means that the only furniture remaining is from the same matching set.  Makes for a much better, put-together room.  LOVE IT!


UPDATE: I had some trouble getting these shams (which was a real "SHAM"!  OH I kill myself!!)  Anyways, I ordered two standards with the duvet, but they were listed as back-ordered until 12/31.  Well, when the duvet finally shipped, the shams were still listed as back-ordered.  I've had trouble before when things say they are back-ordered, only to suddenly change and say "nope, you ain't getttin' squat!" 3 weeks after you made the order!  So, I started fretting and going back and forth about buying the Euro shams, which were still in stock... only to get a notice that said my shams were out-of-stock and sorry, SOL.  Then I looked online, after deciding to get the Euros, and see that THEY were out of stock, but the standards were available for purchase?? Totally confused I called customer service and the lovely lady helped straighten it all out and put me down for a new set.  End of the Story: I got my shams, the bed is made, and I love that WestElm customer service lady, where-ever she may be!

Tuesday, January 11, 2011

this is the bar that jack built, ya'll

[or, how to create a bar from a closet]

Baby, it's cold outside...  And I don't want to leave the house to go out.  Logical decision: build a bar.  Obvious, right?


TA DA!!!  So, we decided to tackle this RIGHT before Thanksgiving... RIGHT before family was coming to stay for the weekend...

genius.

Anyways, this was previously a closet.  Now, this is a bit of a controversial move: in a house that has almost no storage space, why would you get rid of a closet?!  Well, I'll tell you why- because I said so.  There.  So here's how you convert a closet into a (dry) bar:

First step is removing the doors, shelf, hanging bar, and anything else left on the wall.  Then we removed the inside molding.  When you do this, you are left with a gap between the existing drywall and the end stud.  We filled this with GreatStuff, (an expanding insulation foam.)  Once this has hardened and set, we sawed off any excess and spackled over.

 the beau sawing off extra GreatStuff*

After a fresh coat of paint (we painted this the same color as the rest of the living room to really make it part of the room - I forget who makes this paint, but I remember it being called Trench-coat,) we were ready to get crackin!  And apparently, crackin means SHOPPING!!


We lucked out that Ikea has a mirror that fit our design to within half an inch or so??  Perfect!  No glass cutting or special orders!


We also decided to go with a short Gorm shelving unit from Ikea, which fit perfectly AGAIN!  Double awesome.


See how well that mirror fit?  After a trip (or seven) to Home Depot, we got started: we mounted the mirror to measure off of, and installed the support strips.  These will hold the counter and the top shelf.

Here is the puppy sawing some lumber.  Poor pooch never gets a day off!

The counter-top, shelf and molding were bought from Home Depot.  After these were cut to size, they were stained along with the Gorm shelves.  The stain was picked to match the existing furniture in our living room.**  After stain, we poly-urethaned the hell out of everything!  Everything got at least two coats of poly, but the counter-top has four.

Meanwhile, we were also assembling the light box/liquor shelf... yup, like they have in real bars!  The plastic was a cut-to-size order from an online store, which was adhered to the top of a wooden box that was painted black.  Inside the box is a fluorescent light- we installed a new outlet in the old closet by running electrical from the bordering bedroom (where there was an existing outlet right behind the wall,) and installed a light switch and second outlet into the light box, (the second outlet is for blenders, etc.)  One thing to remember when doing this is to drill a hole in the box and the counter-top in the same spot to feed the cord through to the wall outlet.


So, installation!  The first thing to go up was the top shelf.  This was a bit difficult and aggravating, as it is tough to keep the shelf flush with the support beam.  We chose to put the support strips above the shelf because it is prettier that way!

 
The hardware to hang the glasses was purchased online.  We went with a piece of wood that's usually used for stairs, as it has a curved outside edge.  Works fine for a shelf, too!

After the shelf was hung, everything else went fairly quickly- the counter was screwed in, the molding was installed, and the light box was hooked-up.


Here's the molding around the mirror back-splash.  I believe this is technically crown/ceiling molding?  It really finished off the look and hides that extra half-inch gap between the mirror and the wall.


There is also molding on the lip of the counter...


and around the edges of the counter where it met the wall!  Man, look at that corner!!  And that's with just using a manual miter box.***

Now, as for the Gorm shelves- Ikea makes wine/bottle shelves for Gorm, but not for all shelf sizes.  And we happened to get the size that doesn't have the pre-made bottle shelves.  Because that makes life easier.  Anyways, all that needs to be done for a bottle shelf is to install thin 1x1 strips onto the shelves, spaced to accommodate whatever bottles you plan to store there.


We also hooked up a mini-fridge with a basket on top to hide any of the many things that need hiding when you have a bar.


 I think that pretty much sums it up... time for glamor shots!!


this pic was taken pre-bottle & glass stocking

Now, the only problem with having a bar, is you HAVE to stock it....

So whats the internet verdict??  We are beyond thrilled with the outcome and love-love-LOVE showing it off and using it for chic cocktails!  We think it really finishes the room off, and definitely looks better than a boring closet.  And, icing on the cake?  We got this sucker finished, installed, and everything cleaned up all before our guests arrived!!


*You know, that stuff??  It really is great...
**Ugh, it is such a pain in the butt to match a new stain to an old piece of furniture?  It is stupid tough.  So my advice to you would be, if you are staining an item and have any smidgen of a notion that you may want to sometime in the future get another piece to go with that set?  Buy enough stain for the whole dreamed-up project.
***OMG We totally got a fancy-pants miter saw with a LASER for xmas!  IT IS THE BEST EVER!  Molding, get ready to meet your maker!

Monday, January 3, 2011

happy new year!!!

Happy New Year, Kiddos!

Sorry I have been M.I.A., but there was just TOO MUCH going on and SO MANY guests to blog.  Added onto that?  My laptop charging cord broke!  But rest assured, I have replaced said cord and will be back and badder (literally) than ever!!  I hope to have an all-encompassing Christmas post, a new closet-turned-bar post, and a great "my house is insane" post!  Many apologies for keeping the first two items on that list under wraps- we wanted those to be a surprise for our visiting family and the inter-webs have a tendency to ruin that!

Oh, and New Years Resolutions?
1) Finish floor molding in EVERY ROOM OF THE HOUSE!
2) Finish upstairs bathroom renovation.
3) Major outdoor overhaul (curb appeal, backyard living space, actual grass?!??!)


Here's a little glimpse into how we spent our New Years Eve:


Yes, those are all bags...

Tuesday, December 14, 2010

tall glass of wax: coca-cola glass candles


As I was unpacking some of the beau's boxes, I stumbled upon a collection of Coca-Cola glasses.  I was confused.  What?  Where?  When?  Why?


Apparently, he got them for cheap from an artist/student/who-knows?  These seven were in good shape, but there were a handful more that were... bad.  Very bad.  Like with a top still attached or white on the rims?  I don't really know why half-done ones were sold with the finished glasses.... people are weird.


SO, I took the good glasses, dropped a votive in there and decided my grey & yellow & red guest room should REALLY be my grey & yellow & green guest room!  Ta-Da!


The green accent is totally funner and more spring-like.  I'm a fan.  Unlike how I feel about those dressers.  Definitely NOT a fan... just counting the days until I can show those guys who's boss!!

Anyways, I find these guys totally enchanting and awesome.  The multiple, semi-clear glasses add such a twinkle to the room!!!  It's really great.  And better yet?  Don't 100% with things we had laying around the house!

Friday, December 10, 2010

dining in style: table settings and spray-painted candlestick holders

Table settings!  How exciting!!!

Cooper Cameo!

...or ya know, not.  Around October (YES, October- the month that ended 38 days ago.  Shut up,) I laid out a new-to-me (i.e. inherited), thin yellow tablecloth.  I'm really digging the pattern and I love how thin & gauzy it is- makes spills easier to get out!  I threw some small, decorative pumpkins (not pictured) on there & called it a day.

Then, I got inspired.  I envisioned a holiday table full of mis-matched candlestick holders, all in silver finish.  So after obsessing over this idea for a few weeks, I finally got to Goodwill & a local thrift store to raid their selection.

It just so happened the thrift store was having a 1/2 off EVERYTHING sale, that day... so I think I paid a total of $6 for all these candlestick holders:


To clean, I merely submerged* in a big pot of boiling water for a few minutes and wiped/dried with a paper towel.  Added bonus: fun droplets of wax floating around the pot, (and later solidifying into a filmy layer floating on top!)  A quick sanding and it was SPRAY PAINT TIME!**  A few coats of Rustoleum Metallic Silver (making sure to get all angles & crevices!) and done-zo.


*Or, submerged as much as possible, seeing as some were too tall to fit in the pot.  Others had felt bottoms, which I didn't want to get wet, so those were dunked only halfway.***  
**Yes, again with the spray paint.
***WORD TO THE WISE: be very VERY careful when taking the pieces out of the water!  ESPECIALLY with the half-submerged ones!  Water (BOILING water!) tends to collect in crevices you didn't know existed.  This means when you flip the holder right-side up, all that boiling water falls onto your hand and scalds you and then you have to fish out ice cubes from your water while dining at a restaurant with friends to cool the burn.  Seriously, be careful.  It could happen to you.


How'dya like dem, er, pumpkins??!


At first, I piled all those tiny pumpkins in the center, grouped the candlestick holders into two parts and arranged all on top a shiny, olive-y/candy-apple-green table runner (from Overstock.)

... then I got a'lil quirky:


This is how the table looked while family visited over Thanksgiving.... they were amused.  What I found fun was how much the pumpkins encourage playing and rearranging by my guests!  It was a fun conversation starter, at the least.

And then?  Then we enter the Christmas month:


The original vision was to use these candlestick holders to ACTUALLY hold candles!  Wild!  I picked up a container of candlesticks at Ikea for a song.  Went with the "chandelier candles" over pillar/long taper candles as, 1) the tapers were out of stock, 2) tapers are more prone to shifting & sitting at an angle instead of straight up at attention, and 3) I like 'em chunky.  So, literally minutes after my Thanksgiving guests left, I changed up the tablescape because I was a very eager beaver. 

And then I couldn't stop myself...


TA-DA!  This was the vision I had back in early November: 
a) Hodge-podge of candlestick holders, spray painted silver and grouped together
b) Chargers!  Like a grown-up!!  Again, in silver.
c) Lighter (i.e. NON-hunter) green table runner
d) All added to my red plates & INSTANT CHRISTMAS!

I think I did pretty well for myself.  In un-packing some of the beau's boxes, I stumbled upon a set of white, hotel napkins, which complete the look perfectly.


Yes, those are Hershey's Kisses on top of the napkins.

What do ya think?  I do a little happy dance (on the inside) every time I see this.  The runner is perfect!  I wanted a simple runner that could be used for multiple designs and seasons.  As done above, it works great for the fall with more oranges & browns.  Add some red and silver, and we got Christmas.  Maybe add some yellows and light blues or pinks & I'll be set for the springtime???  So many possibilities!

While gift shopping online, I saw Pottery Barn has the same idea... for 3-8 TIMES the cost I paid... FOR A SINGLE CANDLESTICK HOLDER!  Ridiculous.  I also saw Centsational Girl had the same idea for candlestick holders (and beat me to the posting-punch!)- don't they look awesome?  The only problem is resisting the urge to buy more....

Thursday, December 2, 2010

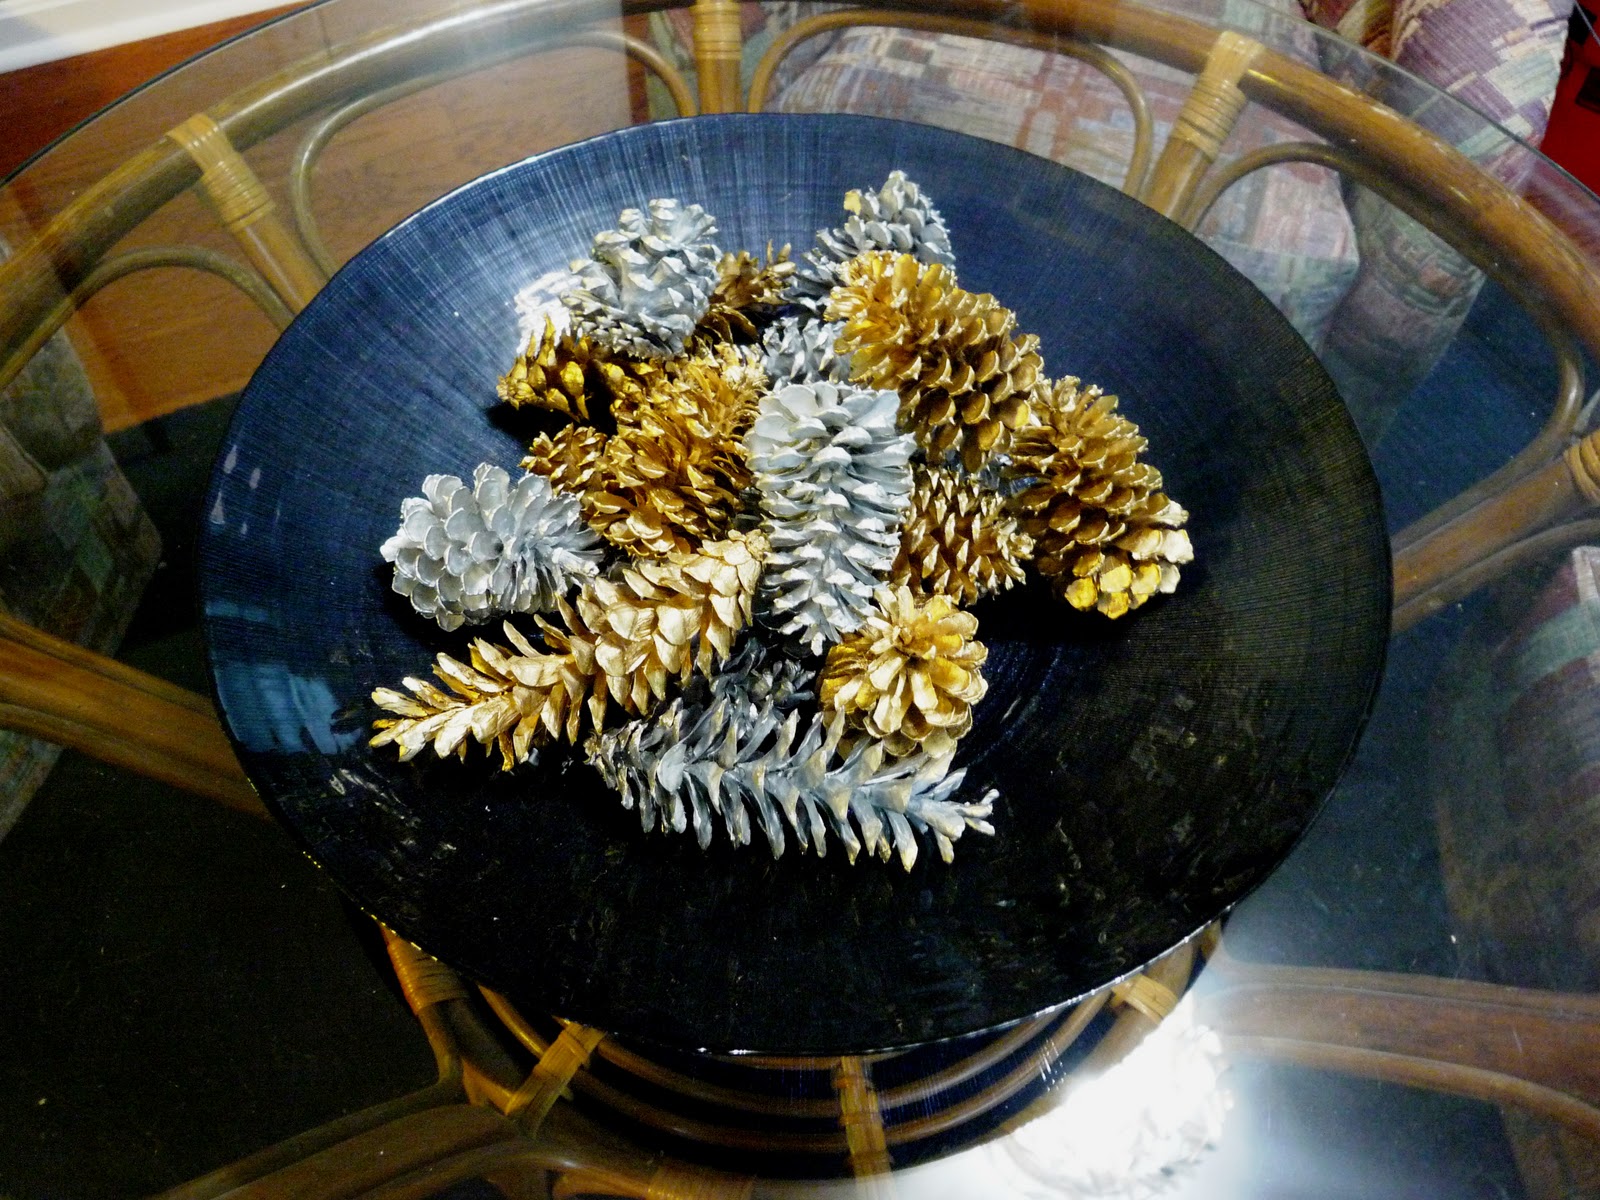
winter centerpiece: silver n gold pine cones!


Uh-oh, here we go again!  More of those spray-painted centerpieces!!  


So, I will spare you another full recap of how I did these- for that you can see the October pumpkins and the November fall decoration posts (hint: find objects, spray paint, let dry, and arrange.)  


For the winter months, I am all about pine cones and silver n gold.  So... that is precisely what I did.  


LOVE IT.  I plan on pulling on some sparkle elsewhere in the room, but you will have to just wait for that!  ...largely, because it isn't finished yet.  Shh!!

wishing you a very hippie holidays: peace wreath

Even hippies have holiday spirit!


So, remembering my new-found desire to decorate for the holidays, it should come as no surprise that I am hitting the ground running for Christmas and the winter months.  I got it in my head that I had to have a peace wreath.  Why?  Because the phrase goes Peace on Earth & Good Will to Man.... so, I thought I would take care of the first part.  You do the second part, and we will be good to go, k?


But then I saw Pier1 and Amazon had them!  And they STOLE my idea!!!  MINE!  The nerve.*


Anyways, a how-to:
1. Buy duct-tape in a color that will match your intended garland.
2. Buy garland.
3. Buy wreath frame & extra for center pieces.  I used straw frames- one large (~2ft) and two small (~8in) frames (these cost about $4 and $2, respectively, at your local craft store.. less if you use a coupon!)  
4. Cut the two small frames at one point and start straightening them.  The frames are held together by a wrapping of fishing line/clear thread, so I went through and snipped these lines, as well.  It takes a couple minutes to work the straw straight and clip any remaining line that's keeping the frame circular.  


5. Measure/fit the straight rods into the larger frame: start first by fitting the long center beam.  Cut to size and secure with duct tape.  Then work on the other two, smaller beams and secure, similarly.  


As you can see, I ran out of the silver tape.** 

6. Start wrapping garland!!  I used super glue to secure the ends, and just worked my way around, making sure to check for bald spots every so often.

It PROBABLY would be a good idea to plan your method of attack to minimize back-tracking and starting new pieces.  But I didn't think of this before starting, I just dove in and then contemplated my options at the first intersection.  

I think this:

...would be the optimal way to go about it.  Now, let us take a moment to bask in the glory that is Paint.

Ahhhh, Paint.

7. Trim any areas you feel the garland is too thick or obscuring the overall shape.
8. Hang on door!  I used a 3M hook (the ones where you can pull the sticky back to remove with no remaining mark or damage to the surface,) and some hanging wire. 
9. Step back & admire.  Contemplate getting some flares and a leather headband.

Total Cost: ~$26


Oh man, I love this!  I found the silver & green garland at Target for $5 or $6 per 18 yards.  I ended up using 2.08 strands of garland (so, about 37 yards; YAY MATH!)... that one last bit needed, the .08 strand, really irritated me.  Made me run back out to the store for a minuscule amount!  But, there was just no way to stretch it, and getting extra meant I could make the wreath fuller.  


Whatcha think?  I kinda love it.  Only, less "kinda" and more "really really".  It makes me happy, and I think it represents a sentiment we can all get behind (oh god, corny!)  I think it would be really cool in a bold red or blue garland, too!


*However, Pier1's cost $99!  And that Amazon one has only 2 stars.  Clearly, my version is rated A MILLION stars and cost way less than 100 smack-a-roos!
**Originally, I was going to do this in all-silver garland.  That was my vision.  But I could only find one place that had silver garland and it was sucky, and this green & silver was really awesome- bling meets homey.  Perfect!