Showing posts with label Crafts. Show all posts

Thursday, March 3, 2011

entry way add-ons

I did a quick little thing to the entryway dresser, and I am really liking the results!  For bearings, when you enter the house, theres a bureau right next to the door, along with a stone-filled boot tray.*  This is where we end up throwing our gloves, sunglasses, and dog leash.... and it always ends up looking a mess.  So, time to fix it!

First, TO THE SPRAY PAINT:

I have no idea where I got this basket, but how retro is that?!?!?!

Took a good number of coats to get in every crack and crevice... but it was spray painting!  So the more coats, the more fun!!

Finished result:

You actually saw this in the Xmas recap.

Perfect for hiding things, like store membership cards or extra dog-walk-bags

Then I saw this awesome idea from House Bella:


LOVE it!  I do like the House Bella galvanized pail (which reminds me of how they display sunglasses in a Fossil store,) but this is a case of workin with whatcha got.  I have two other matching bins of different, nesting sizes, which I hope to put to good use somewhere nearby.  But, in the meantime, this new place to store the leash, totally out of the way!  And neither the sunglasses nor the leash are makin my house look cluttered anymore.**  FOR THE WIN!!! 

I do think the top (dare I say, tablescape?!) needs a tall and medium item or two (listen to Mrs. Bower, she knows.)   


*Awww!  One of my first posts!!    
**I totally believe in that old school saying: a place for everything, and everything in it's place.  It's easier to keep your house clean and orderly that way.... I do not care if I sound like a Grandma.  Shut up.

Sunday, January 23, 2011

holiday re-cap: fa la la la la

 Not too late for a Christmas post, right?  Right.  Again, we didn't want to ruin the surprise for when our families came to visit, so no pre-holiday post!

First things first: The Tree.


This is one fat tree, lemme tell you.  We went to a cut-your-own farm, and SOMEHOW found ourselves looking at the 8-10 footers... our ceilings are not 8-10 feet.  Details, details.  We found that the more mature, taller trees had a better shape (the perfect triangle!) and tended to be fuller all around (particularly at the top).  As luck would have it, many of these larger trees also have a bare trunk for a couple feet before the branches start.  So we simply cut the tree to our height, leaving the rest of the bare trunk behind, and lugged this sucker home!

Next Step: Decorating the Tree!

We are some crazy-lights people, so 345 strands of lights later... ok, maybe not THAT many strands, but close!  We make sure to fully light from the inside to the outside of the tree before thinking about hanging ornaments.  I, also, hang ornaments inside for depth and interest- I found some mirrored star ornaments (Ikea) which reflected all lights and other colors awesomely!  I put all of those puppies deep in the tree.


Also at Ikea, I picked up two other types of ornaments: some black & white and red & white Scandanavian folk style bulbs, and some clear bulbs with red bursts inside.  You can see both in the pics above and below- I cant tell you how much these new ornaments make me happy!!!  


 Another thing we like to do is to have an ornament that is for/represents each member of our family... this gets to be A LOT of fun (read: I took poetic license.  Liberties.)


 First we have me and the beau: I am the mixer- I love how retro it is, and obviously I am le chef de extraordinare.  I am also le French language master.  The beau is the Grill Meister, and if you've had his ribs, you understand why!

Then we have my brother...

Apparently, he is an alligator.

With grey hair and a cape.  

Ok, I will admit that this has nothing to do with my brother, but it cracked me up and I liked the idea of getting him the most ridiculous ornament I could find.  Besides, it is hand-crafted.  From Germany.  He should feel honored I found such a high-quality piece of art.

We found a great golf ornament for my father, and a pagoda for his fiancĂ©e.

This piece of awesomeness is for the beau's brother's girlfriend, who works at an aquarium- I think anyone would be honored to be associated with such a character, don't you?

 And this guy just made us happy- Santa is a bad-ass snowboarder.

Ok, ok, enough with the close-ups, you say, and give us some full-tree-action?  Well, alright already, here it is:


Ta-da!  I love it.  We have a good amount of basic ornaments, and I look forward to accumulating more and more personal (unique!) ornaments in the years to come!

Now, onto the stockings!!!


These babies are from Target, and I instantly fell in love with these guys when I saw them online.  I love how bright and fun the green is, and (in case you can't tell) that white one is more of a cream.  I like the knit look- it feels more authentic and cozy... like these were actual socks that we hung by our, er, TV with care.  Plus?  POM-POMS!!!!


Anyways, it wasn't all snowflakes-on-my-lashes and holiday cheer trying to get these.  You would think it's just a simple trip to the Big T, pick up two of each color and call it a day, wouldn't you? BUT NO!  The first (yes, first) store we went to had all but a second green stocking.  So, we bought them and figured we will just hit up another store for the final one.  Only to go to another store and see they were almost completely out of this style!  This is when I start worrying obsessively.  They did have an extra cream, so we bought that one just-in-case.  THEN, I called every single Target within 20 miles in the hunt for the stocking... I finally found it, and, after sitting almost an hour in rush-hour-traffic, that sucker was MINE!

Totally worth it.

Yup, that's me!

And here are the stocking holders!  Side note: who knew stocking holders were so freakin expensive?!  Back to the matter at hand: these were totally DIY holders.  The base was from Target (and THESE were just as hard to find as the stupid stocking!!!  Every time they came into stock, they flew off the shelves!  Sigh.  Luckily, the store with the stocking had a ton of these guys, which is total fate,) and the picture frames were from Michael's.  A quick bead of super glue (hot glue solidified instantly,) secured the frame to the base, and VOILA!  Instant personalizable* stocking holders!  Now, you can buy these in a store, but they will be a good $5-10 more expensive than crafting it yourself.  We also picked up some garland and cut off a piece and glued to the holder for added decorating awesomeness.


The rest of the garland went around the chandelier... BONUS!


 We threw a set of battery-powered lights (maybe 15-20 lights per strand) in with the pine cone centerpiece to make it more festive- I totally love this effect!  It is one of the first things you see coming in the house, and really added a sense of romance and magic.  Confession: both this and the chandelier garland ideas were courtesy of the beau.  But I will take all the credit that you may chose to bestow on me.


This little guy has been with me since college.  I gave him an update this year by spray-painting the base white, and dusting the needles ever so lightly with more white spray paint.  The overall outcome is awesome- looks like a blue spruce or a light snow dusting!  I also found some silver glitter/shimmer spray paint and put that on, cuz... why not?!  Love.**

Other un-pictured decorations include the previously-posted dining room table centerpiece, some garland on the metal railing, candles in red, silver & green scattered around the house, and a fantastic red, green & white outdoor light arrangement!

And now for the horrors that no one tells you about.  The embarrassment that comes after the lights go off.  The death of the tree:

Our tree skirt is made of pine needles.

Oddly, this tree started falling apart in record time.  Which was, ya know, fun.  Always a good thing to have your tree, that has to survive not one, but TWO Christmases, to clutch desperately to the needles within two weeks of bringing it home.  And we had an automatic waterer!   Not fair, tree nymphs, not fair.  Anyways, every time someone touched the tree- hell, every time you BREATHED on it- a shower of needles would pitter-patter to the floor.  This made getting presents out from under the tree particularly amusing.

We ended up cutting the branches off the trunk, and putting those in a trash bag, instead of carrying the whole thing out of the house.  If we did the latter, for one thing, we wouldn't have been able to get the full width out the sliding door, and  secondly, there would have been a mammoth trail of needles the entire way.  The divide-and-conquer method definitely kept all carnage to one area of the house.

Lovely.

So there you go!  Our holiday house in a nutshell.  Ho ho ho.


*I will make this a real word.  Watch me.
**I have pictures from this, and the spray painting re-do of that little white basket: promise, promise, PROMISE to post that soon!

Tuesday, December 14, 2010

tall glass of wax: coca-cola glass candles


As I was unpacking some of the beau's boxes, I stumbled upon a collection of Coca-Cola glasses.  I was confused.  What?  Where?  When?  Why?


Apparently, he got them for cheap from an artist/student/who-knows?  These seven were in good shape, but there were a handful more that were... bad.  Very bad.  Like with a top still attached or white on the rims?  I don't really know why half-done ones were sold with the finished glasses.... people are weird.


SO, I took the good glasses, dropped a votive in there and decided my grey & yellow & red guest room should REALLY be my grey & yellow & green guest room!  Ta-Da!


The green accent is totally funner and more spring-like.  I'm a fan.  Unlike how I feel about those dressers.  Definitely NOT a fan... just counting the days until I can show those guys who's boss!!

Anyways, I find these guys totally enchanting and awesome.  The multiple, semi-clear glasses add such a twinkle to the room!!!  It's really great.  And better yet?  Don't 100% with things we had laying around the house!

Friday, December 10, 2010

dining in style: table settings and spray-painted candlestick holders

Table settings!  How exciting!!!

Cooper Cameo!

...or ya know, not.  Around October (YES, October- the month that ended 38 days ago.  Shut up,) I laid out a new-to-me (i.e. inherited), thin yellow tablecloth.  I'm really digging the pattern and I love how thin & gauzy it is- makes spills easier to get out!  I threw some small, decorative pumpkins (not pictured) on there & called it a day.

Then, I got inspired.  I envisioned a holiday table full of mis-matched candlestick holders, all in silver finish.  So after obsessing over this idea for a few weeks, I finally got to Goodwill & a local thrift store to raid their selection.

It just so happened the thrift store was having a 1/2 off EVERYTHING sale, that day... so I think I paid a total of $6 for all these candlestick holders:


To clean, I merely submerged* in a big pot of boiling water for a few minutes and wiped/dried with a paper towel.  Added bonus: fun droplets of wax floating around the pot, (and later solidifying into a filmy layer floating on top!)  A quick sanding and it was SPRAY PAINT TIME!**  A few coats of Rustoleum Metallic Silver (making sure to get all angles & crevices!) and done-zo.


*Or, submerged as much as possible, seeing as some were too tall to fit in the pot.  Others had felt bottoms, which I didn't want to get wet, so those were dunked only halfway.***  
**Yes, again with the spray paint.
***WORD TO THE WISE: be very VERY careful when taking the pieces out of the water!  ESPECIALLY with the half-submerged ones!  Water (BOILING water!) tends to collect in crevices you didn't know existed.  This means when you flip the holder right-side up, all that boiling water falls onto your hand and scalds you and then you have to fish out ice cubes from your water while dining at a restaurant with friends to cool the burn.  Seriously, be careful.  It could happen to you.


How'dya like dem, er, pumpkins??!


At first, I piled all those tiny pumpkins in the center, grouped the candlestick holders into two parts and arranged all on top a shiny, olive-y/candy-apple-green table runner (from Overstock.)

... then I got a'lil quirky:


This is how the table looked while family visited over Thanksgiving.... they were amused.  What I found fun was how much the pumpkins encourage playing and rearranging by my guests!  It was a fun conversation starter, at the least.

And then?  Then we enter the Christmas month:


The original vision was to use these candlestick holders to ACTUALLY hold candles!  Wild!  I picked up a container of candlesticks at Ikea for a song.  Went with the "chandelier candles" over pillar/long taper candles as, 1) the tapers were out of stock, 2) tapers are more prone to shifting & sitting at an angle instead of straight up at attention, and 3) I like 'em chunky.  So, literally minutes after my Thanksgiving guests left, I changed up the tablescape because I was a very eager beaver. 

And then I couldn't stop myself...


TA-DA!  This was the vision I had back in early November: 
a) Hodge-podge of candlestick holders, spray painted silver and grouped together
b) Chargers!  Like a grown-up!!  Again, in silver.
c) Lighter (i.e. NON-hunter) green table runner
d) All added to my red plates & INSTANT CHRISTMAS!

I think I did pretty well for myself.  In un-packing some of the beau's boxes, I stumbled upon a set of white, hotel napkins, which complete the look perfectly.


Yes, those are Hershey's Kisses on top of the napkins.

What do ya think?  I do a little happy dance (on the inside) every time I see this.  The runner is perfect!  I wanted a simple runner that could be used for multiple designs and seasons.  As done above, it works great for the fall with more oranges & browns.  Add some red and silver, and we got Christmas.  Maybe add some yellows and light blues or pinks & I'll be set for the springtime???  So many possibilities!

While gift shopping online, I saw Pottery Barn has the same idea... for 3-8 TIMES the cost I paid... FOR A SINGLE CANDLESTICK HOLDER!  Ridiculous.  I also saw Centsational Girl had the same idea for candlestick holders (and beat me to the posting-punch!)- don't they look awesome?  The only problem is resisting the urge to buy more....

Thursday, December 2, 2010

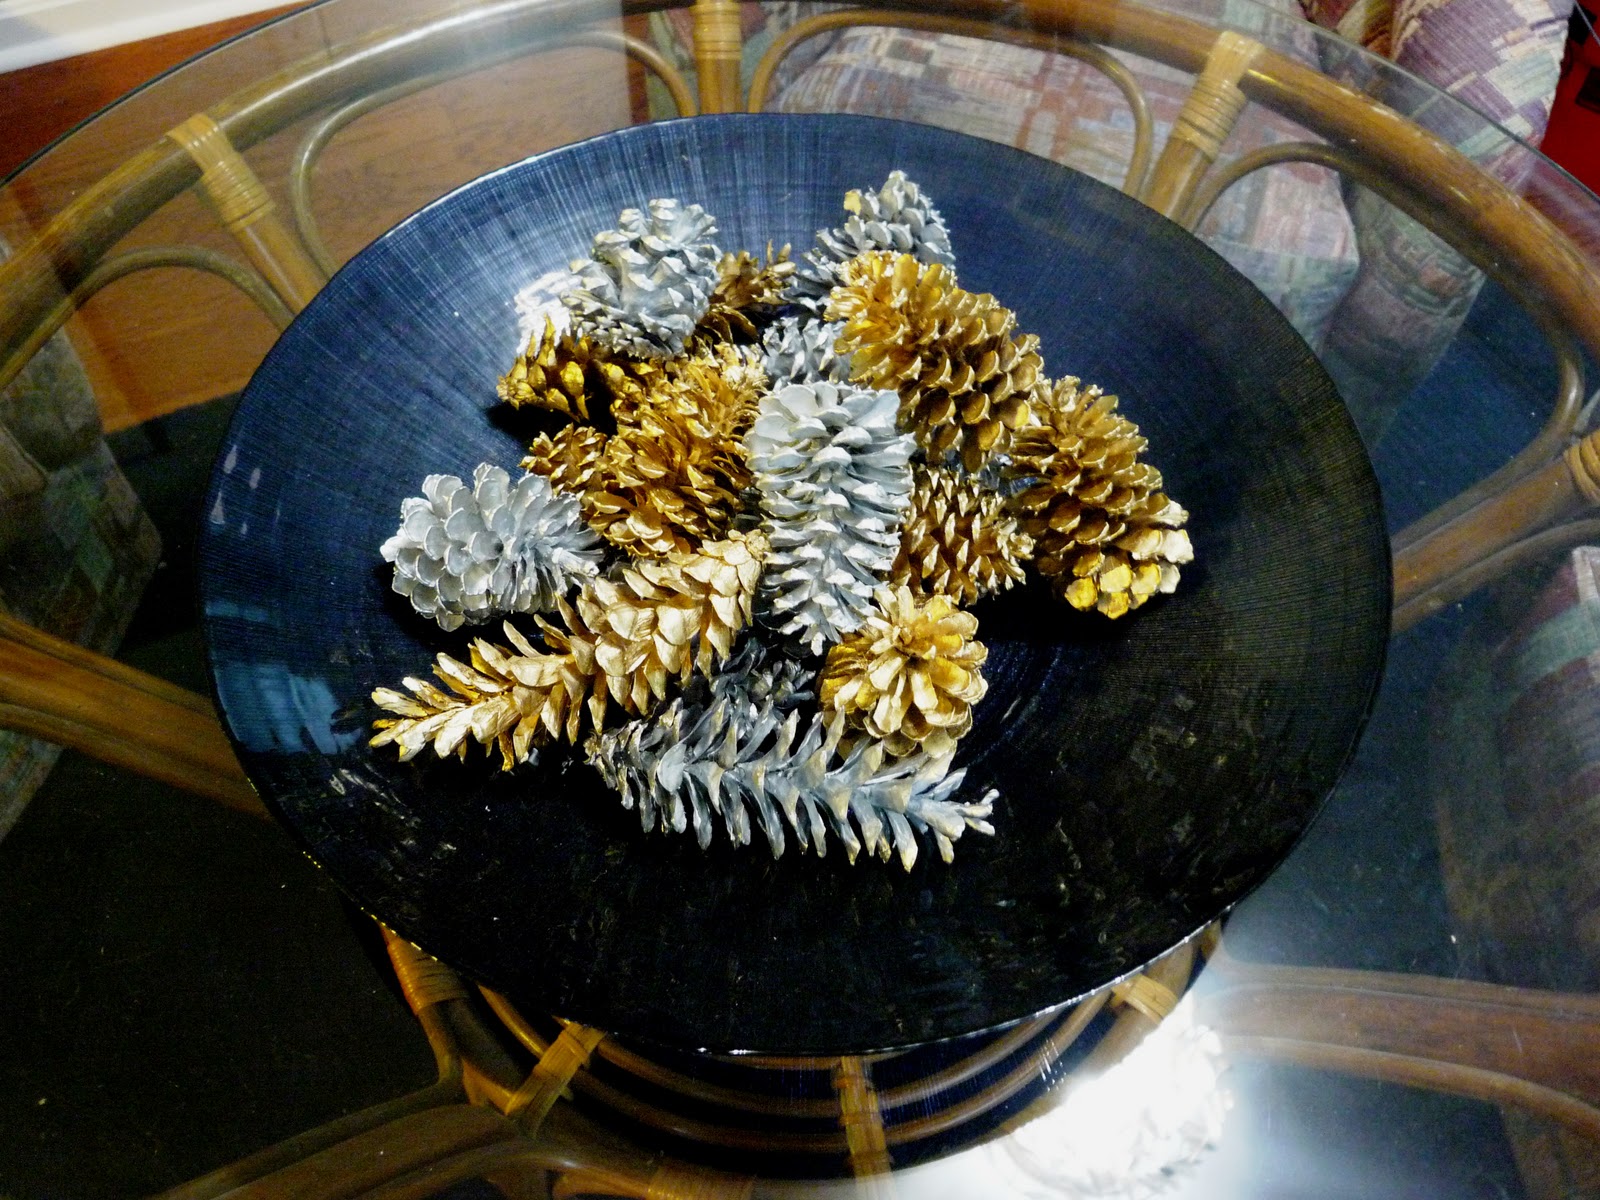
winter centerpiece: silver n gold pine cones!


Uh-oh, here we go again!  More of those spray-painted centerpieces!!  


So, I will spare you another full recap of how I did these- for that you can see the October pumpkins and the November fall decoration posts (hint: find objects, spray paint, let dry, and arrange.)  


For the winter months, I am all about pine cones and silver n gold.  So... that is precisely what I did.  


LOVE IT.  I plan on pulling on some sparkle elsewhere in the room, but you will have to just wait for that!  ...largely, because it isn't finished yet.  Shh!!

wishing you a very hippie holidays: peace wreath

Even hippies have holiday spirit!


So, remembering my new-found desire to decorate for the holidays, it should come as no surprise that I am hitting the ground running for Christmas and the winter months.  I got it in my head that I had to have a peace wreath.  Why?  Because the phrase goes Peace on Earth & Good Will to Man.... so, I thought I would take care of the first part.  You do the second part, and we will be good to go, k?


But then I saw Pier1 and Amazon had them!  And they STOLE my idea!!!  MINE!  The nerve.*


Anyways, a how-to:
1. Buy duct-tape in a color that will match your intended garland.
2. Buy garland.
3. Buy wreath frame & extra for center pieces.  I used straw frames- one large (~2ft) and two small (~8in) frames (these cost about $4 and $2, respectively, at your local craft store.. less if you use a coupon!)  
4. Cut the two small frames at one point and start straightening them.  The frames are held together by a wrapping of fishing line/clear thread, so I went through and snipped these lines, as well.  It takes a couple minutes to work the straw straight and clip any remaining line that's keeping the frame circular.  


5. Measure/fit the straight rods into the larger frame: start first by fitting the long center beam.  Cut to size and secure with duct tape.  Then work on the other two, smaller beams and secure, similarly.  


As you can see, I ran out of the silver tape.** 

6. Start wrapping garland!!  I used super glue to secure the ends, and just worked my way around, making sure to check for bald spots every so often.

It PROBABLY would be a good idea to plan your method of attack to minimize back-tracking and starting new pieces.  But I didn't think of this before starting, I just dove in and then contemplated my options at the first intersection.  

I think this:

...would be the optimal way to go about it.  Now, let us take a moment to bask in the glory that is Paint.

Ahhhh, Paint.

7. Trim any areas you feel the garland is too thick or obscuring the overall shape.
8. Hang on door!  I used a 3M hook (the ones where you can pull the sticky back to remove with no remaining mark or damage to the surface,) and some hanging wire. 
9. Step back & admire.  Contemplate getting some flares and a leather headband.

Total Cost: ~$26


Oh man, I love this!  I found the silver & green garland at Target for $5 or $6 per 18 yards.  I ended up using 2.08 strands of garland (so, about 37 yards; YAY MATH!)... that one last bit needed, the .08 strand, really irritated me.  Made me run back out to the store for a minuscule amount!  But, there was just no way to stretch it, and getting extra meant I could make the wreath fuller.  


Whatcha think?  I kinda love it.  Only, less "kinda" and more "really really".  It makes me happy, and I think it represents a sentiment we can all get behind (oh god, corny!)  I think it would be really cool in a bold red or blue garland, too!


*However, Pier1's cost $99!  And that Amazon one has only 2 stars.  Clearly, my version is rated A MILLION stars and cost way less than 100 smack-a-roos!
**Originally, I was going to do this in all-silver garland.  That was my vision.  But I could only find one place that had silver garland and it was sucky, and this green & silver was really awesome- bling meets homey.  Perfect!